The DN-2000F interface library

The library exposes the following functions:

Start-up:

Init(char *ComPort)
Configures the serial port the RC-35B is connected to.

SetPitchChangeCallback(PitchChangeCallback handler)
Register the callback code for when the pitch changes. This gets called for pitch slider changes and pitch bend.

SetTimeModeCallback(TimeModeCallback handler)
Register the callback code when the TIME button is pressed.

SetPlayPauseCallback(PlayPauseCallback handler)
Register the callback code when the PLAY/PAUSE button is pressed.

SetCueCallback(CueCallback handler)
Register the callback code when the CUE button is pressed.

SetSearchCallback(SearchCallback handler)
Register the callback code when the SEARCH << or >> buttons are pressed.

SetScanCallback(SearchCallback handler)
Register the callback code when the SEARCH << or >> buttons are held down for a period.

Operation:

Load(byte Deck, byte DurationMinutes, byte DurationSeconds, byte DurationFrames)
Sends the track duration to the deck.

UpdateTime(byte Deck, byte Minute, byte Second, byte Frame, bool IsCued, bool IsPaused, bool IsPlaying)
Updates the time display on the deck.

Play(byte Deck)
Puts the deck status in play mode.

Pause(byte Deck)
Puts the deck status in pause mode.

UpdateTimeMode(byte Deck, byte Mode)
Changes the time mode (elapsed or remain) for the deck.

Cue(byte Deck, byte Minute, byte Second, byte Frame)
Puts the deck status in to cue mode.


The following types are used for the callbacks:

In all cases, Deck refers to the deck number – either 1 or 2.

void PitchChangeCallback(byte Deck, float PitchPercent)
PitchPercent is the new pitch value in percent, e.g. 4.2%.

void TimeModeCallback(byte Deck, byte TimeMode)
TimeMode is the new selected mode either 1 for Elapsed, or 2 for Remain.

void PlayPauseCallback(byte Deck)

void CueCallback(byte Deck)

void SearchCallback(byte Deck, byte Direction, byte Speed)
Direction is either 1 for forward, or 2 for backward. The speed starts off at 1 and increases the longer the SEARCH button is held. If the SEARCH button is held long enough it switches to Scan.

void ScanCallback(byte Deck, byte Direction, byte Speed)
Direction is either 1 for forward, or 2 for backward. The speed starts off at 1 and increases the longer the SEARCH button is held.


Typical use:

  1. Assign callbacks for the events.
  2. Call the Init() function passing in the COM port name.
  3. Prepare playback by calling Load() passing in the track duration.
  4. Operate the RC-35B.


A full demo using the Un4seen BASS Audio Library can be found on the SourceForge page: https://sourceforge.net/projects/denon-dn-interface

Interface code now available

I’ve added my Denon DN-2000F interface code to SourceForge:

https://sourceforge.net/projects/denon-dn-interface/

The interface is in the form of a DLL/shared library which exposes functions and callbacks.

At the moment, only Windows is supported. Linux and macOS will follow shortly.

There’s a .NET demo app which shows the interface in action, and it allows you to use both decks on the RC-35B to control the playback of an audio file. The .NET app uses the amazing Un4seen BASS Audio Library for the playback.

See it in action: https://youtu.be/nZoMyLBqc3w


Documentation to follow!

Denon DN-2000F MK II via USB : Part 2

This project is still alive! 🙂

I know it’s been a while since posting an update on this project. I’ve picked it back up and been working on it on and off for the past few months.

The focus has still remained on the DN-2000F mk II model, and I believe I now have the hardware side of it finalised.

Hardware

After much research with various USB UART controllers, the SiLabs CP2102 seemed to be the best choice. You can pick them up for cheap from many eBay sellers and come on PCB boards that have a USB connector and breakout pins.

 – SiLabs CP2102 USB to UART

There are 6 breakout pins:
– 3.3V
– RST
– TXD
– RXD
– GND
– 5V

The Denon DN2000F mk II remote, the RC-35B, runs on 5 volts so we can power it from the 5V pin. This will only work if the USB port is capable of delivering ~150mA, which standard USB ports on a computer will be able to provide. If using a hub, ensure it’s a powered USB hub.

Other required components:

– 1x mini DIN male to male cable
– 1x MC3487 IC (DIP)
– 1x 10nF capacitor
– 2x 1KΩ resistors
– Push-in terminal blocks
– Jump wires

You’ll also need a breadboard, I’m using a KandH AD-14.

Cut one end off the 8 pin male to male mini DIN cable and strip back the wires. You’ll then need to note which colour corresponds to which pin.

 – Looking at the male mini DIN plug. Pins have been numbered.

In the case of my cable:

Pin Colour Notes
1 Brown Ground
2 Red 5V
3 Black Ground
4 Purple RX
5 Orange 5V
6 Blue TX
7 Green TX
8 Yellow RX

Powering the RC-35B

Pins 1 and 3 are interconnected inside the RC-35B, as are pins 2 and 5. Pair (or twist) the brown and black wires together. Do the same with the red and orange wires.

Connect the brown and black wires to GND and the red and orange wires to the 5V breakout pins.

MC3487

The MC3487 is used to convert between TTL and RS-422 signals.

The MC3487 operates on a 5V supply. Connect VCC (pin 16) to the 5V breakout pin. You should also add a capacitor (10nF) between VCC and GND (pin 8). Connect GND to the GND breakout pin.

Connect the inverting OUTPUTS C (pin 11) to the green wire and connect the non-inverting OUTPUTS C (pin 10) to the blue wire. Connect INPUT C (pin 9) to the TXD breakout pin.

Connect INPUT A (pin 1) to the the yellow wire via a 1KΩ resistor and connect INPUT B (pin 7) to the purple wire, again via a 1KΩ resistor. Connect OUTPUT A (pin 2) to the RXD breakout pin.

How it looks on a breadboard

Note that the edge terminals are connected to the following on the USB breakout:

RED: 5V
BLACK: GND
BLUE: TXD
GREEN: RXD

I started off with inserting the mini DIN cable wires in to terminals and plugged them in to the breadboard:

Then plugged in the MC3487:

Connected 5V to the MC3487 and added in the decoupling capacitor. I also connected the 5V to the red and orange wires:

Next, the GND is connected GND on the MC3487 and the black and brown wires:

Connected the OUTPUTS C of the MC3487 and INPUT C to the TXD breakout pin:

Plugged in 1KΩ resistors for the yellow and purple wires:

Connected INPUT A and B on the MC3487 and connected OUTPUT A to the RXD breakout pin:

And that’s it.

The next post will be around the software and looking how it can interact with the likes of Mixxx.

Kodi Virtual File System Video Add-on

I have several media sources across various web sites and computers and wanted a way to bring them all together in an organised structure that I can navigate from Kodi. Although Kodi offers adding sources from SMB, NFS, WebDAV etc, I needed a bit more flexibility.  In my mind I needed to present a virtual file system to Kodi so set out on making this; my first plug-in.

The concept is very simple. There will be a MySQL database which represents the file system and the file nodes will have a URL (or endpoint) which points to the physical video file.

The plug-in was developed with Kodi 16 (Jarvis) on Windows 10.

Step 1: The Database Schema

Now, there are many ways a file system can be represented in a database. In this example I’ve opted for a single table for all the files and folders using a parentid relationship:

CREATE SCHEMA kodivfs;

CREATE TABLE `kodivfs`.`listing` (
 `id` INT UNSIGNED NOT NULL AUTO_INCREMENT,
 `parentid` INT NULL,
 `type` CHAR(1) NOT NULL,
 `name` VARCHAR(255) NOT NULL,
 `url` VARCHAR(255) NULL,
 PRIMARY KEY (`id`),
 UNIQUE INDEX `id_UNIQUE` (`id` ASC),
 INDEX `ix_parentid` (`parentid` ASC));

type is either F for a file or D for a directory.

Step 2: File and Folder Records

I’ll start off with making two “root” folders called Movies and TV. I will add files directly in to Movies and for TV I will create sub-folders for each TV show and the seasons.

Visually the structure will look like this:

+ Movies
  - The Shawshank Redemption
  - The Godfather
  - Pulp Fiction
  - Fight Club
+ TV
  + 24
    + Season 1
      - Episode 1: 12:00 A.M. - 1:00 A.M.
      - Episode 2: 1:00 A.M. - 2:00 A.M.
      - Episode 3: 2:00 A.M. - 3:00 A.M.
      - Episode 4: 3:00 A.M. - 4:00 A.M.
    + Season 2
      - Episode 1: 8:00 A.M. - 9:00 A.M.
      - Episode 2: 9:00 A.M. - 10:00 A.M.
      - Episode 3: 10:00 A.M. - 11:00 A.M.
      - Episode 4: 11:00 A.M. - 12:00 P.M.
  + Grimm
    + Season 1
      - Episode 1: Pilot
      - Episode 2: Bears Will be Bears
      - Episode 3: Beeware
      - Episode 4: Lonelyhearts
    + Season 2:
      - Episode 1: Bad Teeth
      - Episode 2: The Kiss
      - Episode 3: Bad Moon Rising
      - Episode 4: Quill
  + Suits
    + Season 1
      - Episode 1: Pilot
      - Episode 2: Errors and Omissions
      - Episode 3: Inside Track

Insert the two “root” folders, Movies and TV:

INSERT INTO `kodivfs`.`listing` (`type`, `name`) VALUES ('D', 'Movies');
INSERT INTO `kodivfs`.`listing` (`type`, `name`) VALUES ('D', 'TV');

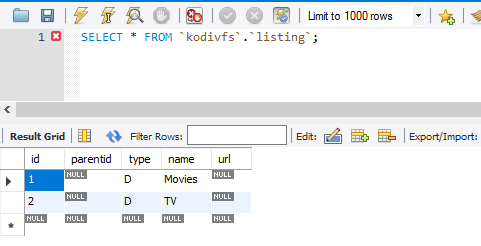
Verify the ids for the folders created. In this case, Movies is id 1, TV is id 2:

Insert records for the movies, ensuring the parentid is correct:

INSERT INTO `kodivfs`.`listing` (`parentid`, `type`, `name`, `url`) VALUES (1, 'F', 'The Shawshank Redemption', 'https://webserver1.privateserver.com/movies/TheShawShankRedemption.mkv');
INSERT INTO `kodivfs`.`listing` (`parentid`, `type`, `name`, `url`) VALUES (1, 'F', 'The Godfather', 'https://webserver1.privateserver.com/movies/TheGodfather.mkv');
INSERT INTO `kodivfs`.`listing` (`parentid`, `type`, `name`, `url`) VALUES (1, 'F', 'Pulp Fiction', 'https://webserver2.privateserver.com/movies/PulpFiction.avi');
INSERT INTO `kodivfs`.`listing` (`parentid`, `type`, `name`, `url`) VALUES (1, 'F', 'Fight Club', 'https://webserver2.privateserver.com/movies/FightClub.mkv');

Create the structure for TV ensuring the correct parentid is used for each level:

INSERT INTO `kodivfs`.`listing` (`parentid`, `type`, `name`) VALUES (2, 'D', '24');
INSERT INTO `kodivfs`.`listing` (`parentid`, `type`, `name`) VALUES (7, 'D', 'Season 1');
INSERT INTO `kodivfs`.`listing` (`parentid`, `type`, `name`) VALUES (7, 'D', 'Season 2');
INSERT INTO `kodivfs`.`listing` (`parentid`, `type`, `name`) VALUES (2, 'D', 'Grimm');
INSERT INTO `kodivfs`.`listing` (`parentid`, `type`, `name`) VALUES (10, 'D', 'Season 1');
INSERT INTO `kodivfs`.`listing` (`parentid`, `type`, `name`) VALUES (10, 'D', 'Season 2');
INSERT INTO `kodivfs`.`listing` (`parentid`, `type`, `name`) VALUES (2, 'D', 'Suits');
INSERT INTO `kodivfs`.`listing` (`parentid`, `type`, `name`) VALUES (13, 'D', 'Season 1');

And then the records for the TV episodes:

INSERT INTO `kodivfs`.`listing` (`parentid`, `type`, `name`, `url`) VALUES (8, 'F', 'Episode 1: 12:00 A.M. - 1:00 A.M.', 'https://webserver1.privateserver.com/tv/24/season1/1.mkv');
INSERT INTO `kodivfs`.`listing` (`parentid`, `type`, `name`, `url`) VALUES (8, 'F', 'Episode 2: 1:00 A.M. - 2:00 A.M.', 'https://webserver1.privateserver.com/tv/24/season1/2.mkv');
INSERT INTO `kodivfs`.`listing` (`parentid`, `type`, `name`, `url`) VALUES (8, 'F', 'Episode 3: 2:00 A.M. - 3:00 A.M.', 'https://webserver1.privateserver.com/tv/24/season1/3.mkv');
INSERT INTO `kodivfs`.`listing` (`parentid`, `type`, `name`, `url`) VALUES (8, 'F', 'Episode 4: 3:00 A.M. - 4:00 A.M.', 'https://webserver1.privateserver.com/tv/24/season1/4.mkv');

INSERT INTO `kodivfs`.`listing` (`parentid`, `type`, `name`, `url`) VALUES (9, 'F', 'Episode 1: 8:00 A.M. - 9:00 A.M.', 'https://webserver1.privateserver.com/tv/24/season2/1.mkv');
INSERT INTO `kodivfs`.`listing` (`parentid`, `type`, `name`, `url`) VALUES (9, 'F', 'Episode 2: 9:00 A.M. - 10:00 A.M.', 'https://webserver1.privateserver.com/tv/24/season2/2.mkv');
INSERT INTO `kodivfs`.`listing` (`parentid`, `type`, `name`, `url`) VALUES (9, 'F', 'Episode 3: 10:00 A.M. - 11:00 A.M.', 'https://webserver1.privateserver.com/tv/24/season2/3.mkv');
INSERT INTO `kodivfs`.`listing` (`parentid`, `type`, `name`, `url`) VALUES (9, 'F', 'Episode 4: 11:00 A.M. - 12:00 P.M.', 'https://webserver1.privateserver.com/tv/24/season2/4.mkv');

… etc…

Step 3: The plug-in

Start with creating a new folder called plugin.video.vfsdemo and inside there create a new text file called addon.py.

Open addon.py with Notepad (or your text editor of choice) and paste the following code:

import sys
import urllib
import urlparse
import xbmcgui
import xbmcplugin
import mysql.connector

base_url = sys.argv[0]
addon_handle = int(sys.argv[1])
args = urlparse.parse_qs(sys.argv[2][1:])

def build_url(query):
    return base_url + '?' + urllib.urlencode(query)

parentid = args.get('parentid', None)

conn = mysql.connector.connect(user='kodi', password='kodi', host='127.0.0.1', database='kodivfs')
try:
    cursor = conn.cursor(buffered=True)
    try:
        if parentid is None:
          query = "SELECT `id`, `name`, `type`, `url` FROM `kodivfs`.`listing` WHERE parentid IS NULL ORDER BY `type` DESC, name ASC"
        else:
          query = 'SELECT `id`, `name`, `type`, `url` FROM `kodivfs`.`listing` WHERE parentid = {} ORDER BY `type` DESC, name ASC'.format(parentid[0])

        cursor.execute(query)
 
        for (id, name, type, url) in cursor:
          if type == 'F':
            li = xbmcgui.ListItem(name, iconImage='DefaultVideo.png')
            xbmcplugin.addDirectoryItem(handle=addon_handle, url=url, listitem=li)
          elif type == 'D':
            li = xbmcgui.ListItem(name, iconImage='DefaultFolder.png')
            xbmcplugin.addDirectoryItem(handle=addon_handle, url=build_url({'parentid': id}), listitem=li, isFolder=True)
 
         xbmcplugin.endOfDirectory(addon_handle)
     finally:
       cursor.close();
finally:
 conn.close();

The code checks to see if a parentid parameter was passed through to the plug-in, if it was then select the items from the parent folder. It then works it’s way through the results calling xmbc.addDirectoryItem() to populate the list you’ll see in Kodi.

Next create another file in the same folder called addon.xml and populate it with the following:

<?xml version="1.0" encoding="UTF-8" standalone="yes"?>
<addon id="plugin.video.vfsdemo" name="Virtual File System Demo Add-on" version="1.0.0" provider-name="blog.petejefferson.co.uk">
 <requires>
   <import addon="xbmc.python" version="2.1.0"/>
   <import addon="script.module.myconnpy" version="1.1.7" />
 </requires>
 <extension point="xbmc.python.pluginsource" library="addon.py">
   <provides>video</provides>
 </extension>
 <extension point="xbmc.addon.metadata">
   <summary lang="en_gb">Virtual file system provider</summary>
   <description lang="en_gb">Represent a file system using a MySQL backend</description>
   <disclaimer lang="en_gb"></disclaimer>
   <language></language>
   <platform>all</platform>
   <license></license>
   <forum></forum>
   <website></website>
   <email></email>
   <source></source>
   <news></news>
   <assets>
   <icon></icon>
   <fanart></fanart>
   <screenshot></screenshot>
   </assets>
 </extension>
</addon>

Create a zip file of the plugin.video.vfsdemo folder (in Windows Explorer you can right click and choose Send to > Compressed (zipped) folder). Copy the file to a location accessible from Kodi.

Step 4: Installing to Kodi

Navigate to System > Settings > Add-ons in Kodi.

Choose “Install from zip file” and navigate to plugin.video.vfsdemo.zip.
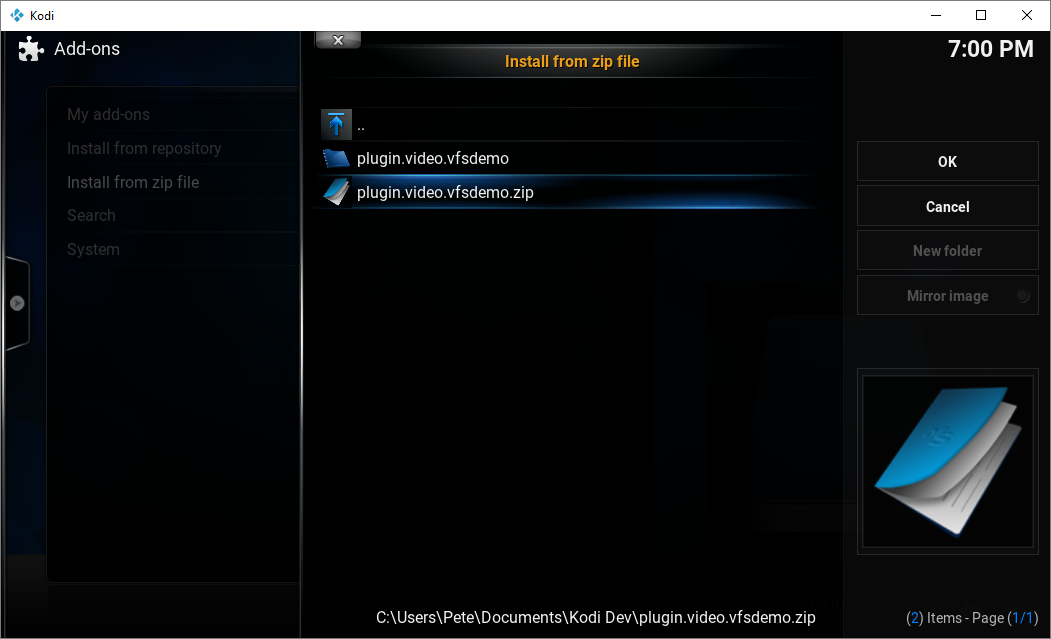
And click OK.

All being well you will see a notification that the add-on was successfully installed.
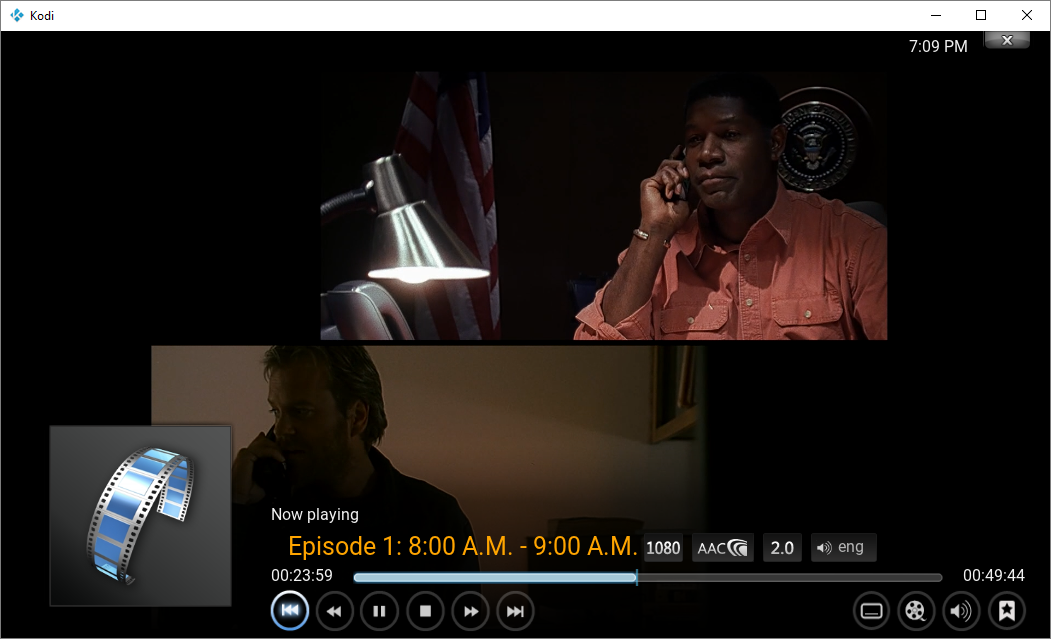
Step 5: Test

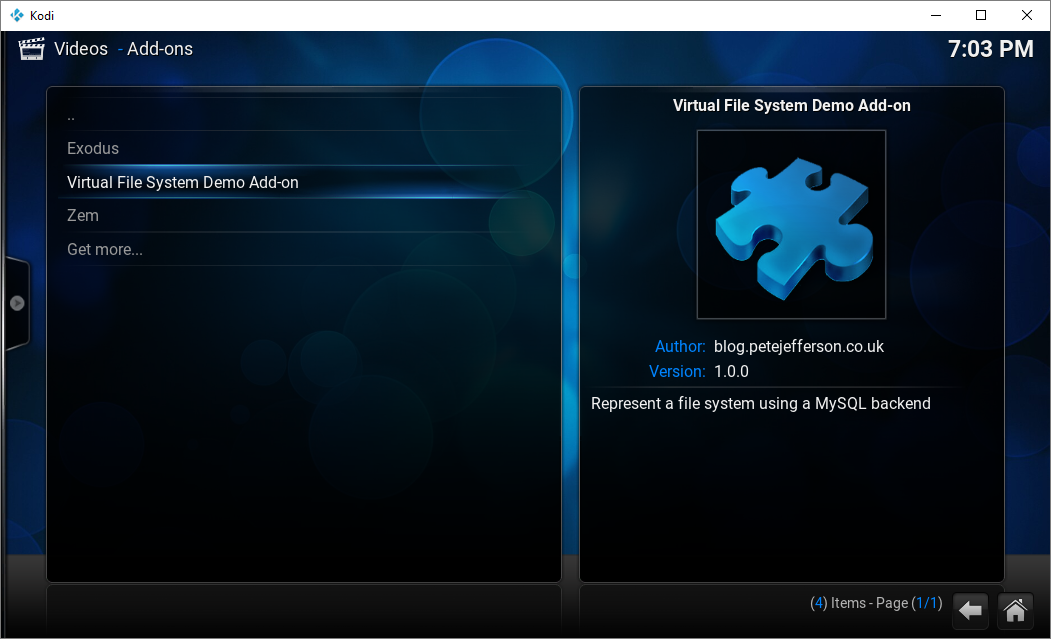
Navigate to Videos > Add-ons and select the Virtual File System Demo Add-on.

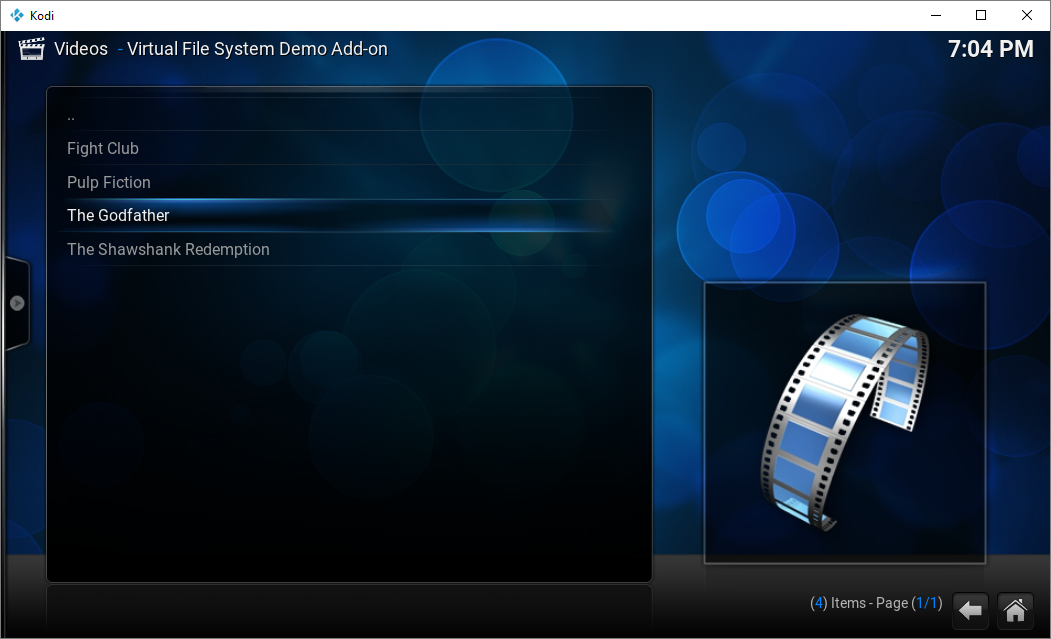
You’ll then be presented by the contents of the “root” folder, in this case Movies and TV. Going in to Movies will show all files that have that parentid:

Go up a folder and explore TV:

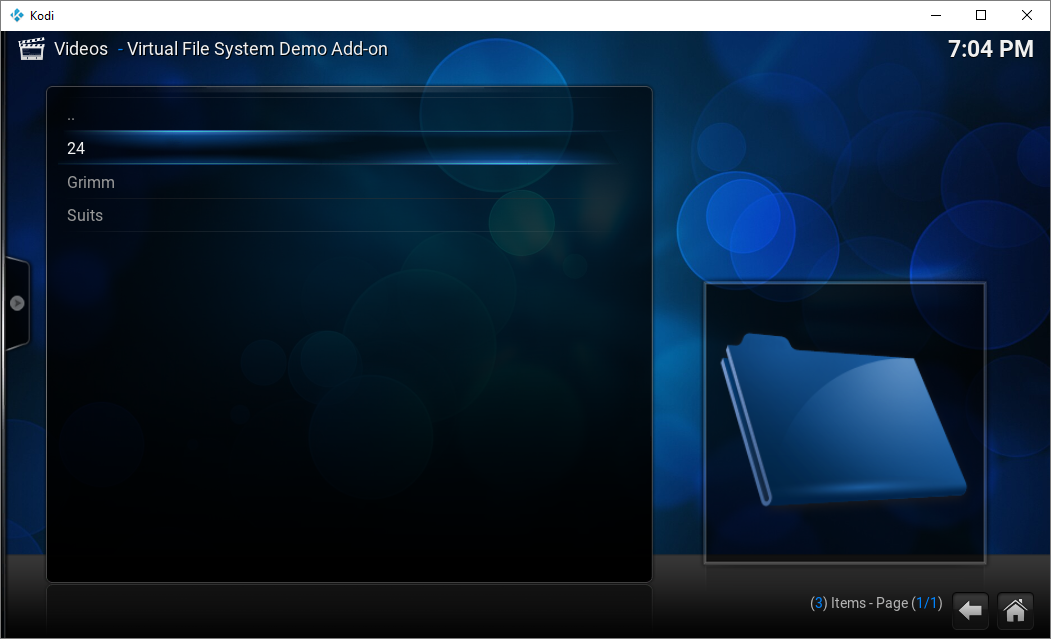
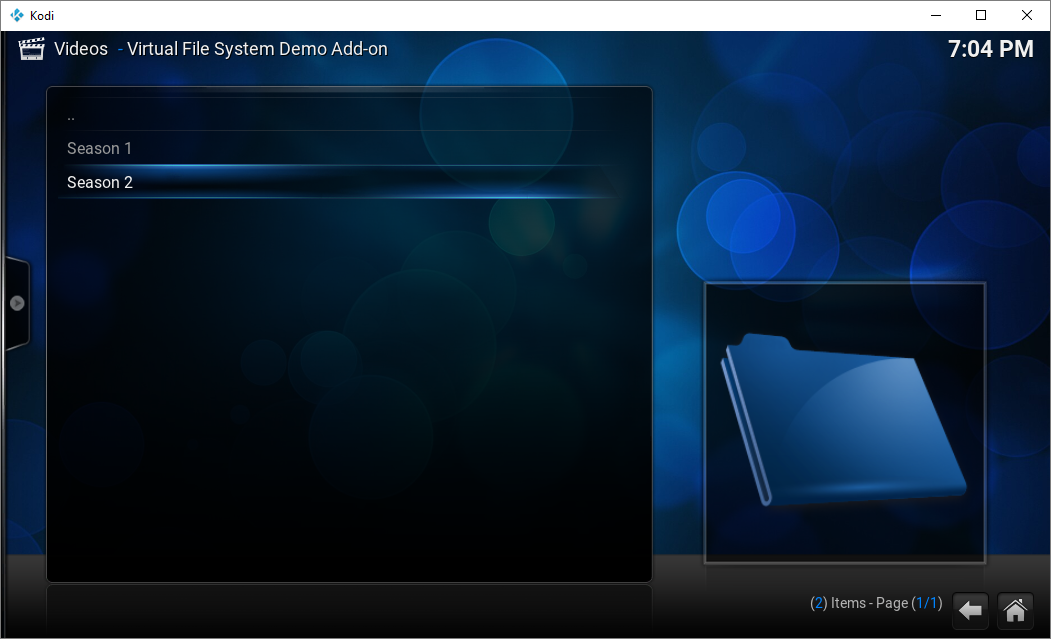
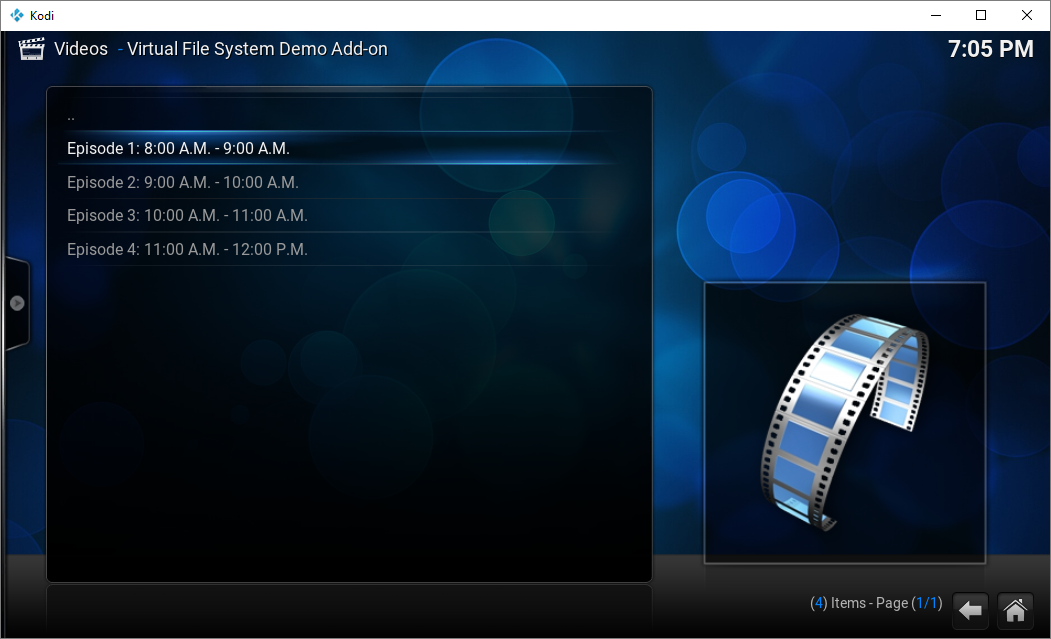
If you have your URLs set up correctly in the database, you will be able to watch your videos.

Denon DN-2000F MK II via USB : Part 1

In this post I will detail how to connect to a Denon DN-2000F MK II CD player’s RC-35B remote unit.

The connector

The RC-35B is connected to the player unit via a 8 pin mini DIN. These pins have been numbered and coloured accordingly:

8pin

[table width="200px"]
Pin,Colour
1,Red
2,Brown
3,Orange
4,Purple
5,Black
6,Yellow
7,Green
8,Blue
[/table]

Let’s take a look at the schematic for the RC-35B in the service manual:

sch1

We can see that pins 1 and 3 are interconnected, as are pins 2 and 5. Measuring with a multimeter shows that these provide +5V 140mA to the RC-35B.

The other pins are connected to a Motorola MC34051, which is a dual EIA RS-422/423 transceiver. Pin 4 of the DIN is connected to pin 13 of the MC34051, pin 6 is connected to pin 14, pin 7 is connected to pin 1 and pin 8 is connected to pin 2:

[table width=”500″]

DIN Pin,Colour,MC34051 Pin, Description

4,Purple,13,Driver 1 Out
6,Yellow,14,Driver 1 Out (high)
7,Green,1,Receive 1 In +
8,Blue,2,Receive 1 In –

[/table]

From here we see that the RC-35B transmits on pins 4 and 6, and receives on pins 7 and 8.

 RS-422

As the player and remote communicate via the RS-422 standard it should be pretty simple to sniff the conversation. I have myself a RS-422 to USB interface cable from FTDI Chip and connected it up as follows:
[table width=”500px”]
DIN Pin, Colour, Cable Pin, Cable Colour, Description
4,Purple,8,White,RXD(-)
6,Yellow,5,Yellow,RXD(+)
7,Green,4,Orange,TXD(+)
8,Blue,3,Red,TXD(-)
[/table]

The RC-35B is still connected to the player unit; I’m merely piggybacking on to the pins.

It’s time to capture the serial data using RealTerm.

Let’s press some buttons on the RC-35B and see what we get!

Capture1

Hmmm… doesn’t look to make much sense. I’ll clear the terminal and just press the open/close button on deck 1:

Capture2

I pressed the open/close button on deck 1 a total of 10 times which generated a total of 70 bytes — which all seem to be same block of 7 bytes:

00 80 00 41 00 08 FC

How about when I press the open/close button on deck 2?

Capture3

It’s 70 bytes again for the 10 presses, but it doesn’t seem consistent 🙁

Baud Rate

After trial and error with different Baud rates I eventually found consistency with the data received following button presses. The Baud rate is now set to 90,000 and pressing the open/close buttons on both decks generates the following:

Capture4

I pressed each button 5 times. This resulted in a total of 100 bytes of data meaning that each press generates 10 bytes of data. And there is a pattern too! Let’s format the display to be a width of 10 bytes – 1 command:

Capture5

It looks like the first byte is the deck number, 1 or 2, and 58 is the command for open/close. The rest of the data is just zeros; perhaps they’re not needed for this particular command.

The Commands

All of the commands from the RC-35B have been discovered and are listed here:

[table]

Byte 0, Byte 1, Byte 2, Byte 3 – Byte 9, Description

Deck,0x42,Track number,0x00,Track change

Deck,0x43,Amount,0x00,Pitch change

Deck,0x46,0x00,0x00,Play/pause

Deck,0x48,Speed,0x00,Scan

Deck,0x49,Speed,0x00,Search

Deck,0x4C,0x00,0x00,Cue

Deck,0x50,Mode,0x00,Time toggle (elapsed/remain)

Deck,0x58,0x00,0x00,Open/close

[/table]

To be continued…!

Denon DN-2000F/DN-2500F via USB : Introduction

Denon DN-2000F mk III

Back in the 90’s, DJs used vinyl and CDs. One of the most popular DJ CD players was the Denon DN-2000F. This CD player really was a work horse and Denon further improved it with the mk II and mk III models.

There was also the Denon DN-2500F which added extra cool functionality to that of a DN-2000F including key control, up to +/- 16% pitch control, sampler, vocal reducer and brake effect.

Denon DN-2500F

As time went on and technology progressed, CDs were to be replaced by laptops and MP3s. Whilst this is a big convenience factor it was never going to beat the look and feel of a DJ CD player. Some DJ software can utilise these CD players through special sine wave recorded CDs which can be interpreted in the software to deduce the track position and pitch, but not only is the solution prone to problems, it’s also costly.

What if it was possible to interface with the Denon DN-2500F remote directly?

Here’s a preview of what’s been achieved so far:

sniffer1

The protocol which the DN-2500F uses has been sussed and now it’s a case of deciphering the commands.